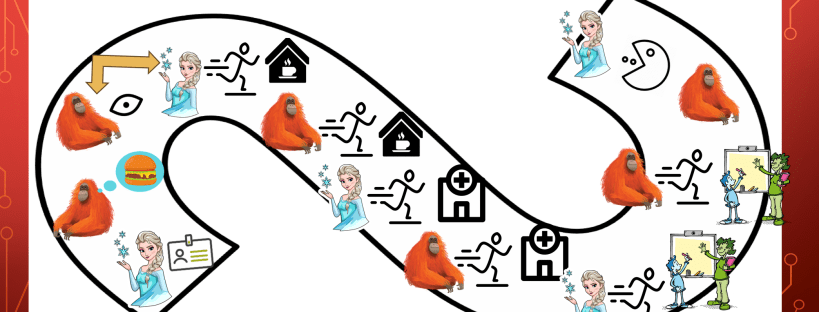
Every time I used parts of Talk for Writing (TfW) in my Language lessons, watching my preliterate students experience success with retelling stories in Indonesian was so rewarding. The beauty of this strategy is the way in which it offers ways for preliterate learners to successfully ‘read’ and ‘re-read’ a familiar story and because learners are ‘reading’ images, the retelling is not limited to the text as it would be in a written story; it is limited only by the learners level of acquisition! Doesn’t this blow your mind when you take into account the young age of preliterate learners!
So, I would like to now take you through a breakdown of how this is done this over a ten week term, with one lesson per week. I really hope you can see that teaching our preliterate learners, our most enthusiastic and fearless cohort of learners, should not be limited to colours and numbers because they too can benefit enormously from Acquistion Driven Instruction (ADI).
Before I start though, it is important to undertand how the story I am using for this post fits into my Indonesian program. In my Scope and Sequence, this story, Elsa Makan Elsa (Crocodile eats Elsa), is the third I will teach the students in their first year of Indonesian. The preceding stories are Pleased To Meet You (Jim Tripp) and The Spongebob Story (Linda Li). Both can be found here.
As limiting vocabulary is vital for language acquistion, you may be surprised to read through my yearly list of Target Structures (TS) for the my reception (prep) learners. However the most significant aspect of my scope & sequence is that each story builds on from the preceding one with all structures being either high frequency (top 10) or vital for a story (eg buaya/crocodile). Thus, my students will already have encountered several of the TS’s before beginning this story.

Buaya Makan Elsa:
The story ‘Buaya Makan Elsa’ (The crocodile ate/eats Elsa) is based on a Carol Gaab story.
Ada buaya.
Buaya lapar.
Buaya lihat Elsa.
Buaya mau makan Elsa
Elsa berlari ke (your town/city/suburb).
Buaya berlari ke (your town/city/suburb).
Elsa berlari ke (your school).
Buaya berlari ke (your school).
Elsa berlari ke kelas Bahasa Indonesia.
Buaya berlari ke kelas Bahasa Indonesia.
Buaya makan Elsa.
Translation:
There’s a crocodile.
The crocodile is hungry.
The crocodile see Elsa.
Elsa berlari ke (your town/city/suburb).
The crocodile runs to (your town/city/suburb).
Elsa berlari ke (your school).
The crocodile runs to (your school).
Elsa berlari ke kelas Bahasa Indonesia.
Buaya berlari ke kelas Bahasa Indonesia.
The crocodile eats Elsa.
Target Structures (The vocabulary I will target this term)
buaya/crocodile
lapar/ hungry
lihat/sees
berlari ke/runs to
makan/eat
In lessons 1 – 3, I introduce the target structures and through Total Physical Respsonse (TPR), Kursi Luar Biasa (Special Person Interviews), Picture Talk, and calling the roll asking, Apa Kabar? (How are you?) learners receive fun and compelling repetitions of each.
For example, in lesson 2, I will introduce the Target Structure ‘lapar’ (hungry). I will do this firstly before I call the roll. I will point to the poster on the wall, say the word, do the gesture (rubbing my tummy with big eyes) and tell the meaning. I do not ask students to guess the meaning as sometimes this has led to future confusion. Its so much better to establish the meaning clearly and then get as many reps saying it with the gesture throughout the upcoming lesson. I always begin lessons calling my class roll on class dojo, asking each student, “Apa Kabar?” (How are you?) If a student hesitates, I might ask them, “Jenny lapar? Kelas, Jenny Lapar!” If Jenny shakes their head, I restate, “Jenny tidak (not) lapar!” Then again check in with Jenny, “Jenny tidak lapar?” Sometimes I will also award pandai points for students using the structure confidently in context – especially if the pandai points need boosting!
After sitting listening to the roll, we immediately head into TPR to get students moving. Here I get reps on past target structures eg stand, walk, dance, jump, and then add lapar, and then introduce makan. Again by saying the word, showing the gesture and then establishing meaning. I will include phrases like makan (students mime eating), makan es krim (students mime eating an ice cream), makan hotdog, makan buaya (Aduh Bu Cathy!) Sneaky rep for buaya and follow up with a comprehension check for meaning!!
In Kursi Luar Biasa, I will have a huge bag of cognate food props eg hotdog, hamburger, ice cream, avocado, broccoli, buaya, etc and will include in the individual student interview input based on hungry and eat. Eg Jenny lapar? Jenny mau makan hotdog? Jenny tidak mau makan hotdog? Oke. Jenny mau makan es krim? Ohh, Jenny mau makan es krim. Pete, kasih Jenny es krim. Wow, Jenny pandai!! Jenny berkata, terima kasih Pete!! After I have found several food items that Jenny wants, I take a photo of Jenny pretending to eat one or all and that photo will be used for next lesons picture talk to get more reps on hungry & eat!
Depending on time, I also like to include a series of quirky pictures I’ve found on Google images for additional reps on the lesson target structures. I begin with a photo of someone holding a food cognate eg pizza. I will ask questions about it eg laki-laki atau perempuan? (boy or girl?) Laki-laki lapar? Laki-laki mau makan brokoli? and so on. I usually have 4-5 pictures ready in case any fall flat and then next, I ramp it up by having a shape covering the item the person/animal is holdiing/eating in the picture. This leads to questions including; anjing (dog) atau buaya? Buaya makan apa? Buaya makan apel? Ya, Buaya tidak makan apel. Buaya makan stroberi atau hotdog? Then removing the shape and celebrating with the students who guessed correctly! Young learners absolutely love guessing games and they are perfect for repetitions of target structures.
By lesson 4, the students are ready to listen to the story. I love story asking with student actors and the class love watching the acting especially if there are quirky props involved. Dont forget to remind your students that if they are not comfortable wearing, saying or looking funny, they might prefer to be in the audience. Using the actors, I tell the story slowly getting as many reps as possible, doing lots of comprehension checks (with the audience, not the actors), and asking actors to redo their acting if it did not clearly demonstrate meaning. It is important not to rush through the acting. It is the first time the class has heard the story and it is critical they comprehend it completely. Also, with colourful wigs, funny clothes, huge hats, &/or masks, the audience will definitely not complain watching a scene several times! They will be so engaged, they won’t realise they’ve been sitting still and fully focused on the story!
Straight afterwards, allowing the actors to choose whether they continue with the props or not, the entire class is asked to stand in a huge circle for part 2 of All The World Is a Stage (ATWAS). I have blogged about this here (scroll down to (variation # 2). Students now have the opportunity to not only get moving but also demonstrate their own amazing acting skills.
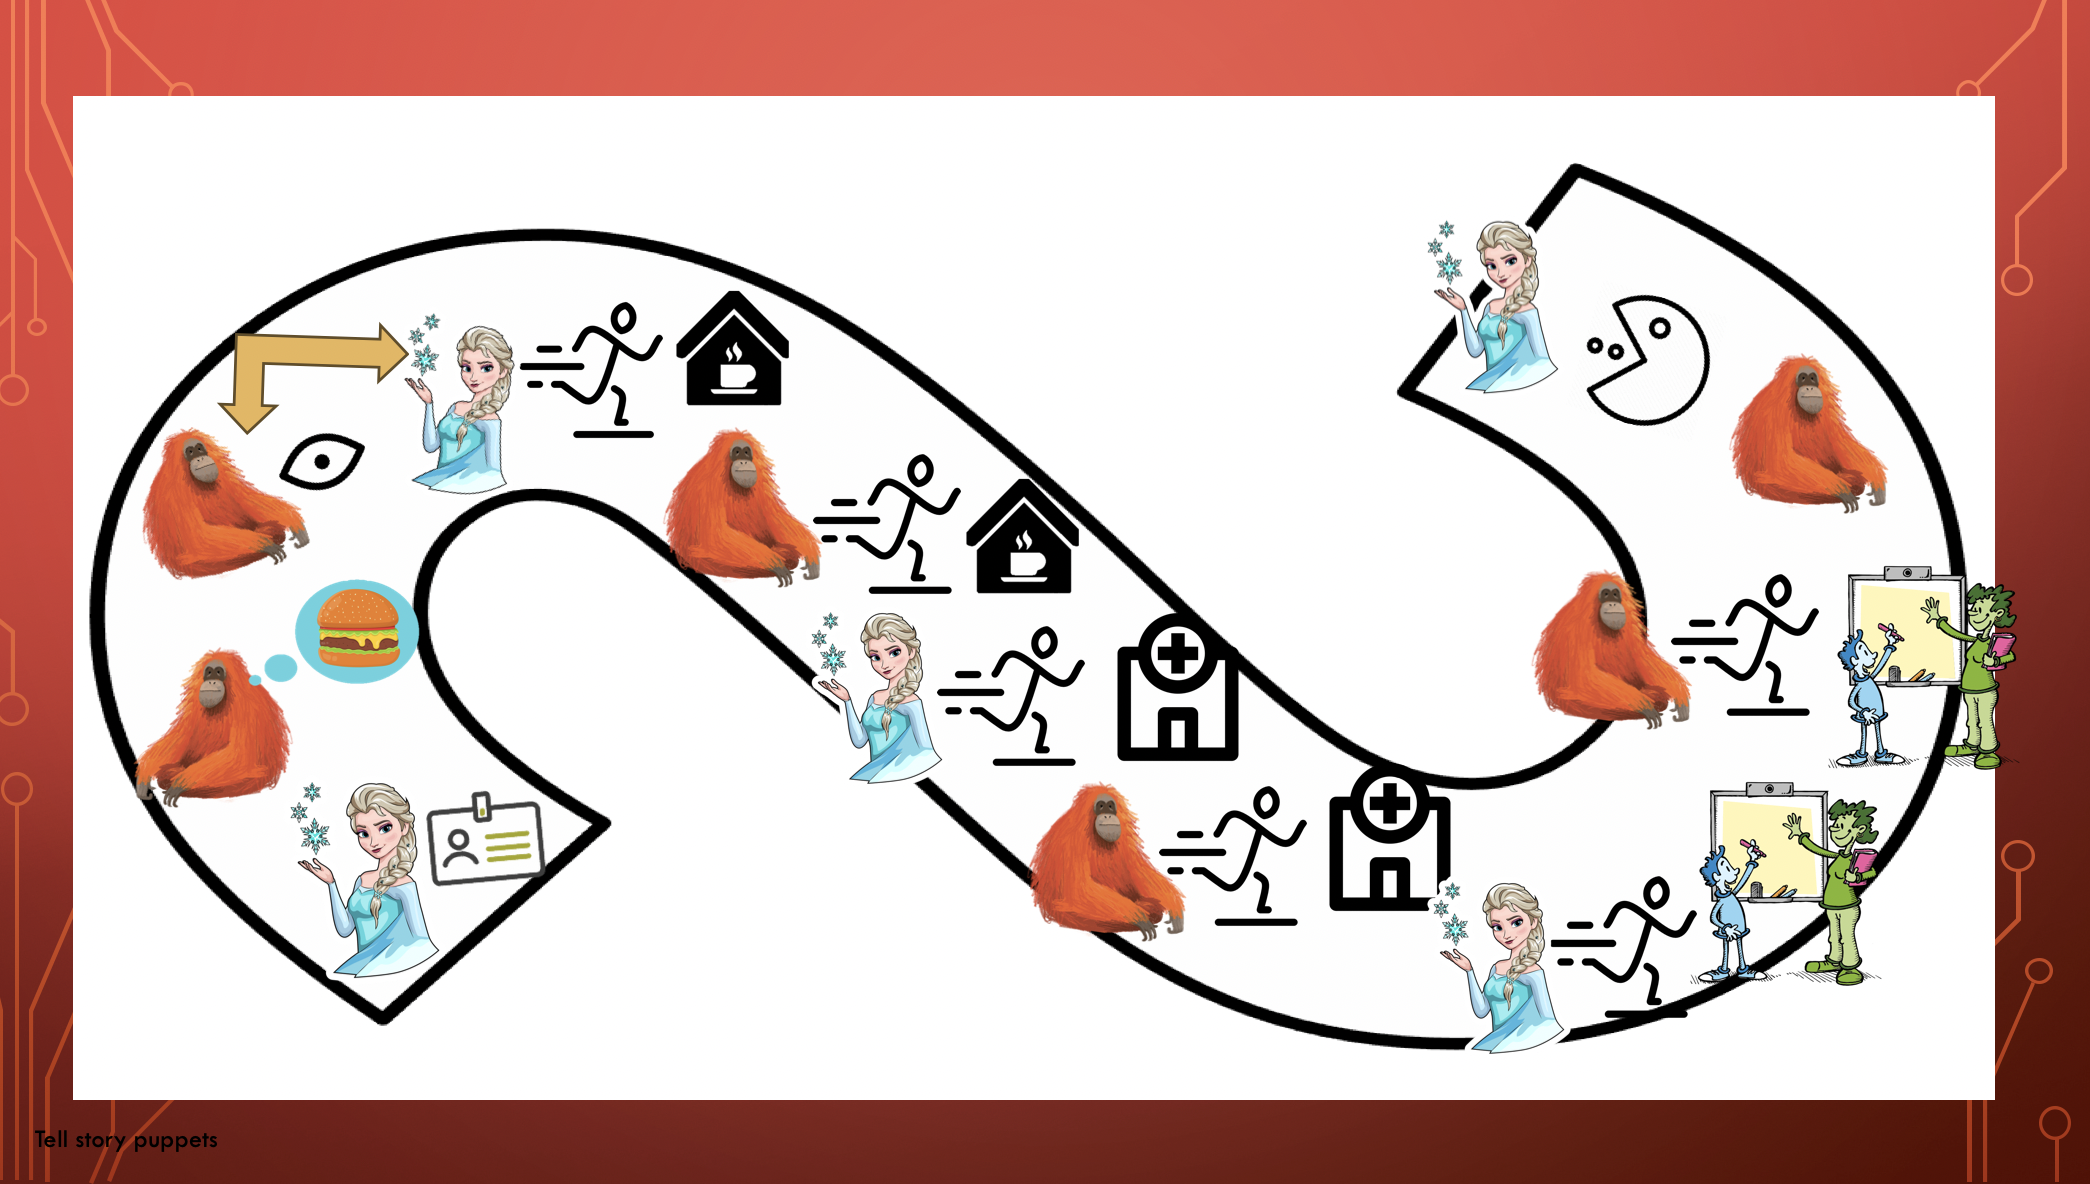
After students have watched the story with actors and acted it out themselves, they get their first taste of the story told with images. I firstly read it to them while pointing to the images that represent the target structures of the story. At this stage I encourage my students to only listen and understand; I do not want them choralling with me as it’s important that the first telling is accurate. The second time I read it, I invite students to choral read with me if they’d like to.
Note: The story below is technically a parallel story which should NOT be used for the first read through if sticking to the original version. It is though, a story I have used previously and demonstrates how stories can be adapted easily to include certain curriculum items.
Lesson 5 includes the third and final ATWAS variation where students in pairs act out the story one more time. This variation is quite time consuming but well worth it. The way in which I do this can be read in this post (scroll down to Variation 3) which serendipitously is based on the Elsa story!! It’s worth reading to the bottom of that paragraph to discover a popular twist on ending this TPR variation!!
After the final ATWAS variation, I show a YouTube clip of the story. I absolutely love making these clips and uploading them to my youtube channel for students to access after school or in the holidays. Thankfully students thoroughly enjoy watching them because showing the clips gives you the teacher, a little breathing space!
Below is the clip for the Elsa dan Ortangutan story version:
The last part of this video is a read through of the story using the Backwards S from above. I try to consistently point to the images that represent each target structure as I am telling the story. Directly after the video, I project a copy of the Backwards S up on to the screen to use for more repetitions of the story. This time I encourage students to join in with me for the retell. The initital retell is told at a slower pace, including repetitions & comprehension checks as needed. Celebrate student engagement and effort with pandai points!! After a few slow run-throughs, I like to invite a student to come out the front and demonstrate their awesome reading skills. This offers students an opportunity to shine and you will be amazed at just how well they can retell the story through reading. I like to record my superstars – not only is it impressive evidence to share at parent teacher evenings, but it can also be shared with theirs and other classes for bonus repetitions! Watch them puff up with pride!!
A final note about the student retells; because they offers valuable story repetitions, it is ok to softly choral read with the student if they require it and its also totally ok to provide the target structures if they look for support. It is all about building confidence through success!
During Lesson 6, in preparation for the assessment task next lesson, I hand out a copy of the Backwards S story to all students. I encourage them to find a comfy spot and try to read the story quietly to themselves. I circulate checking in with students, encouraging them to read through as often as time permits. Then following this, students swap the complete Backwards S of the story for an edited version where one aspect of the story is replaced with a blank circle. For example, for this story, the circle shape could replace one of the characters plus give students the choice at the end of who will eat who. If using the circle for a new location, I advise being sneakily prescriptive with young’uns, ensuring that acepted suggestions are ones that have simple representations/logos eg golden arches, otherwise students will spend too much time with their masterpieces and a perfect product is not what this is all about. Here are some images from a different story (similar to this one) with the circle replacing the food used in the original story.
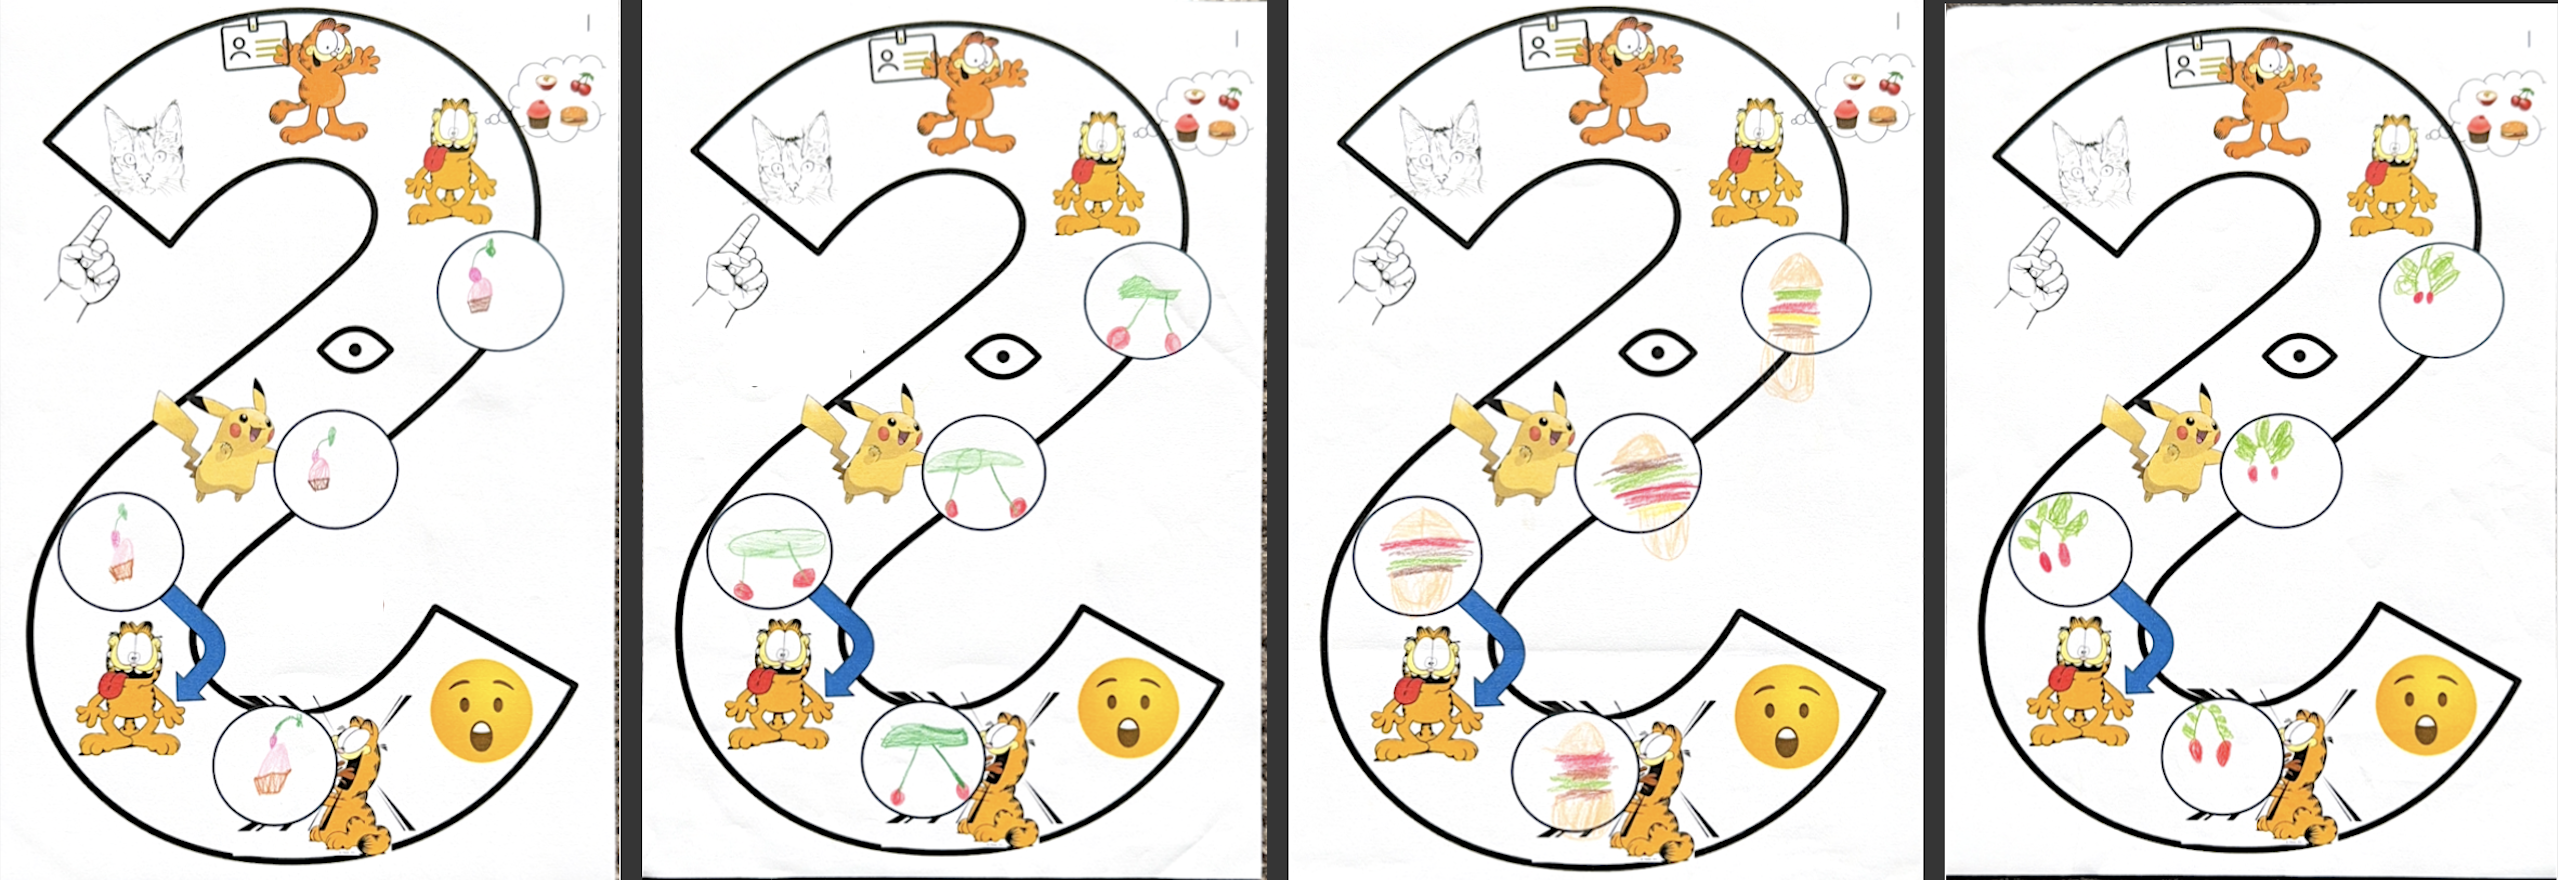
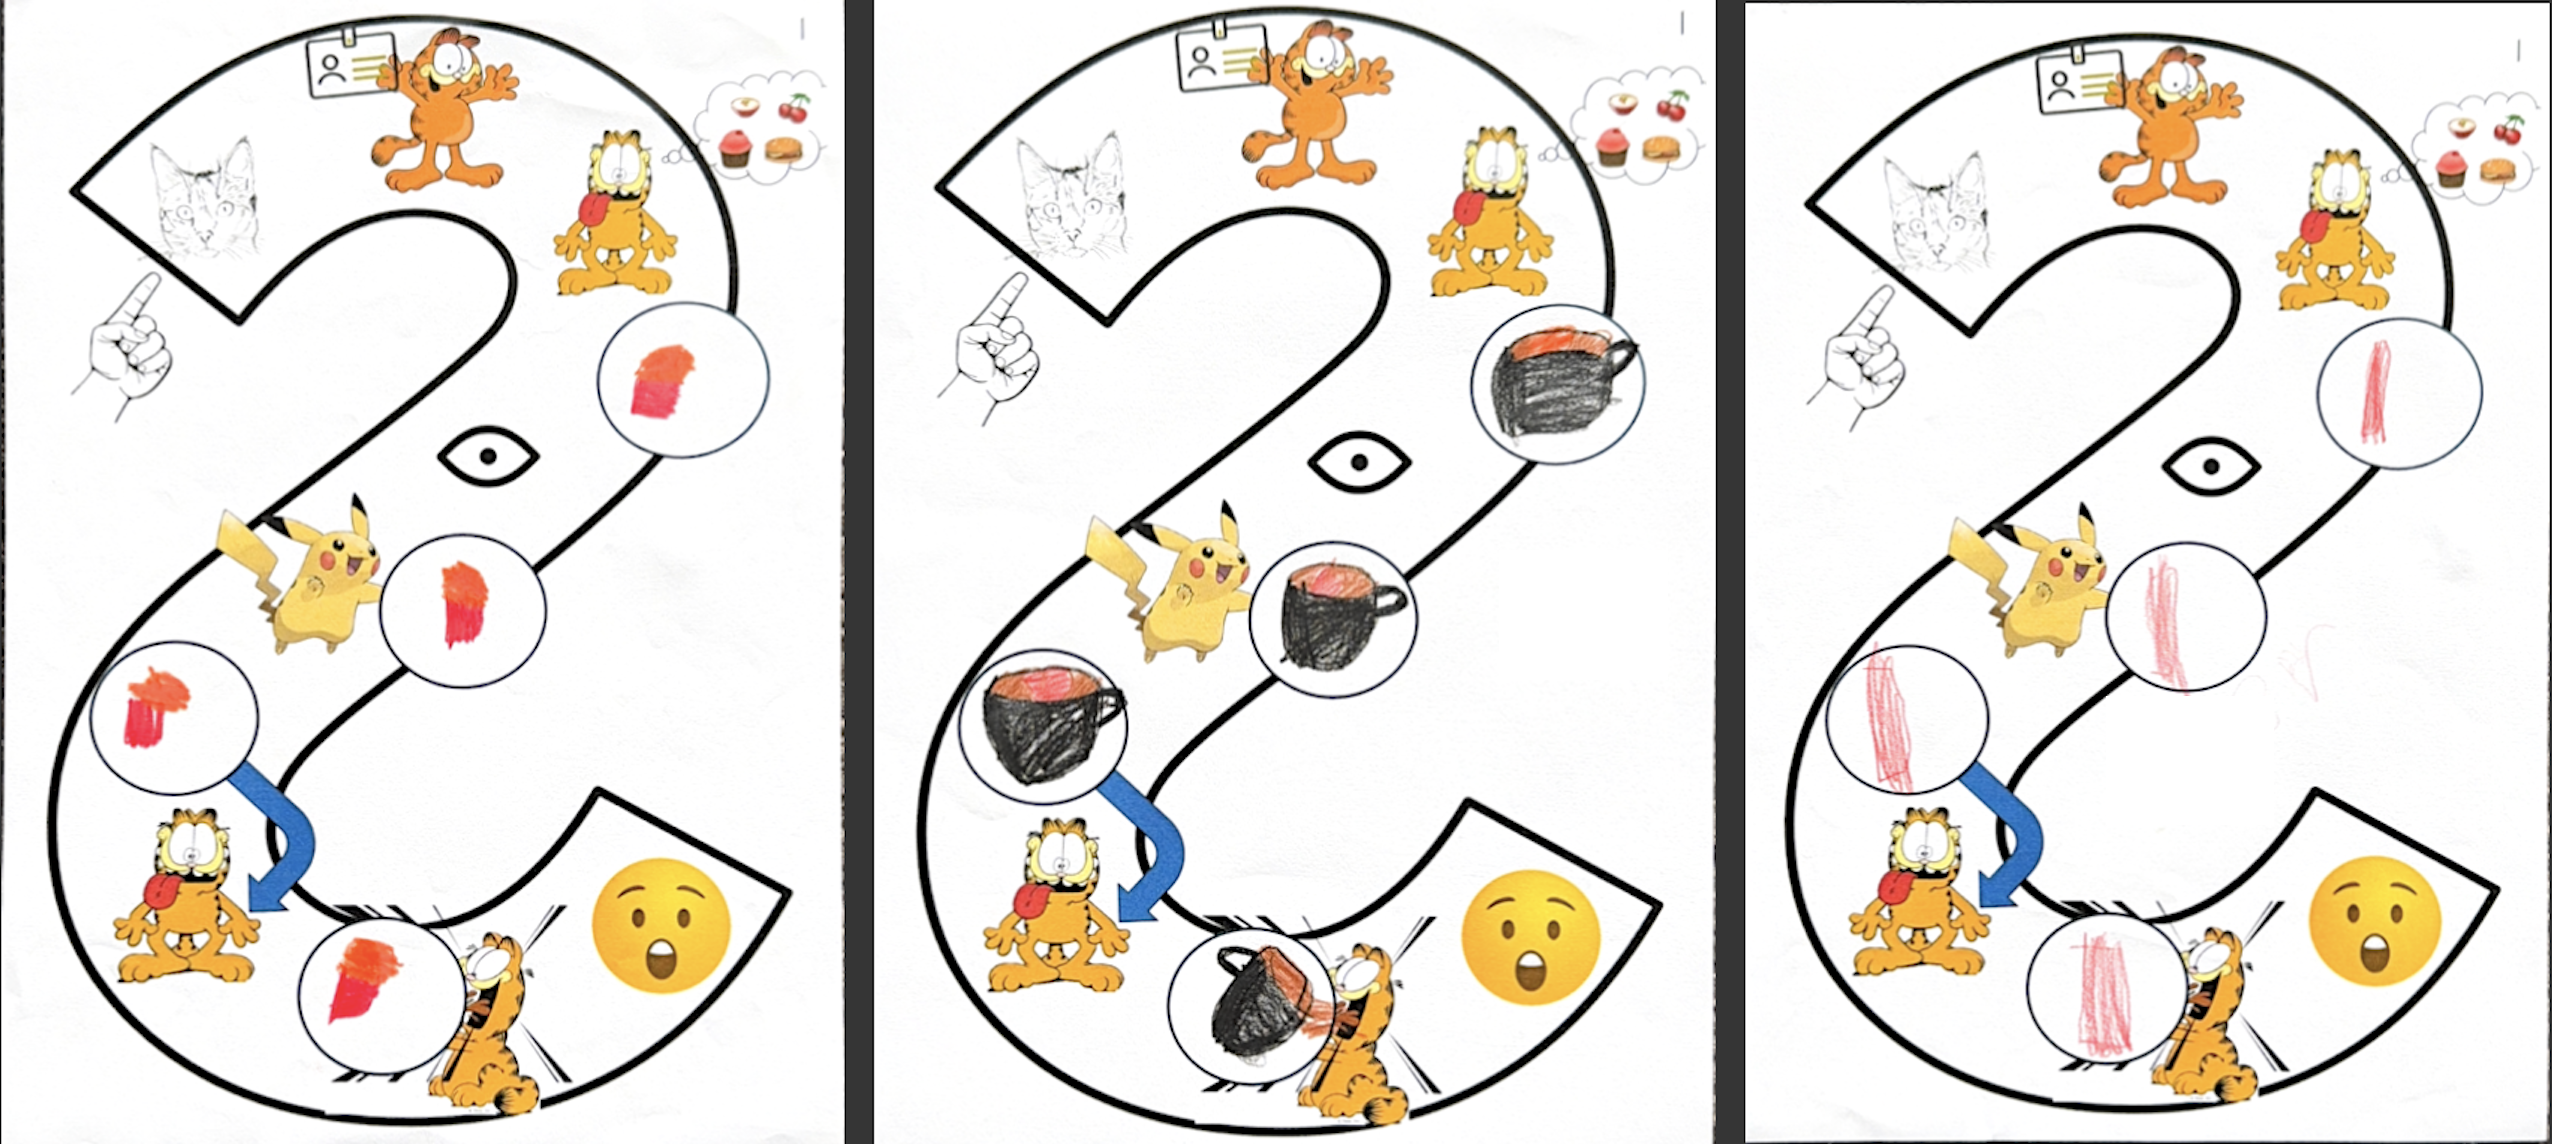

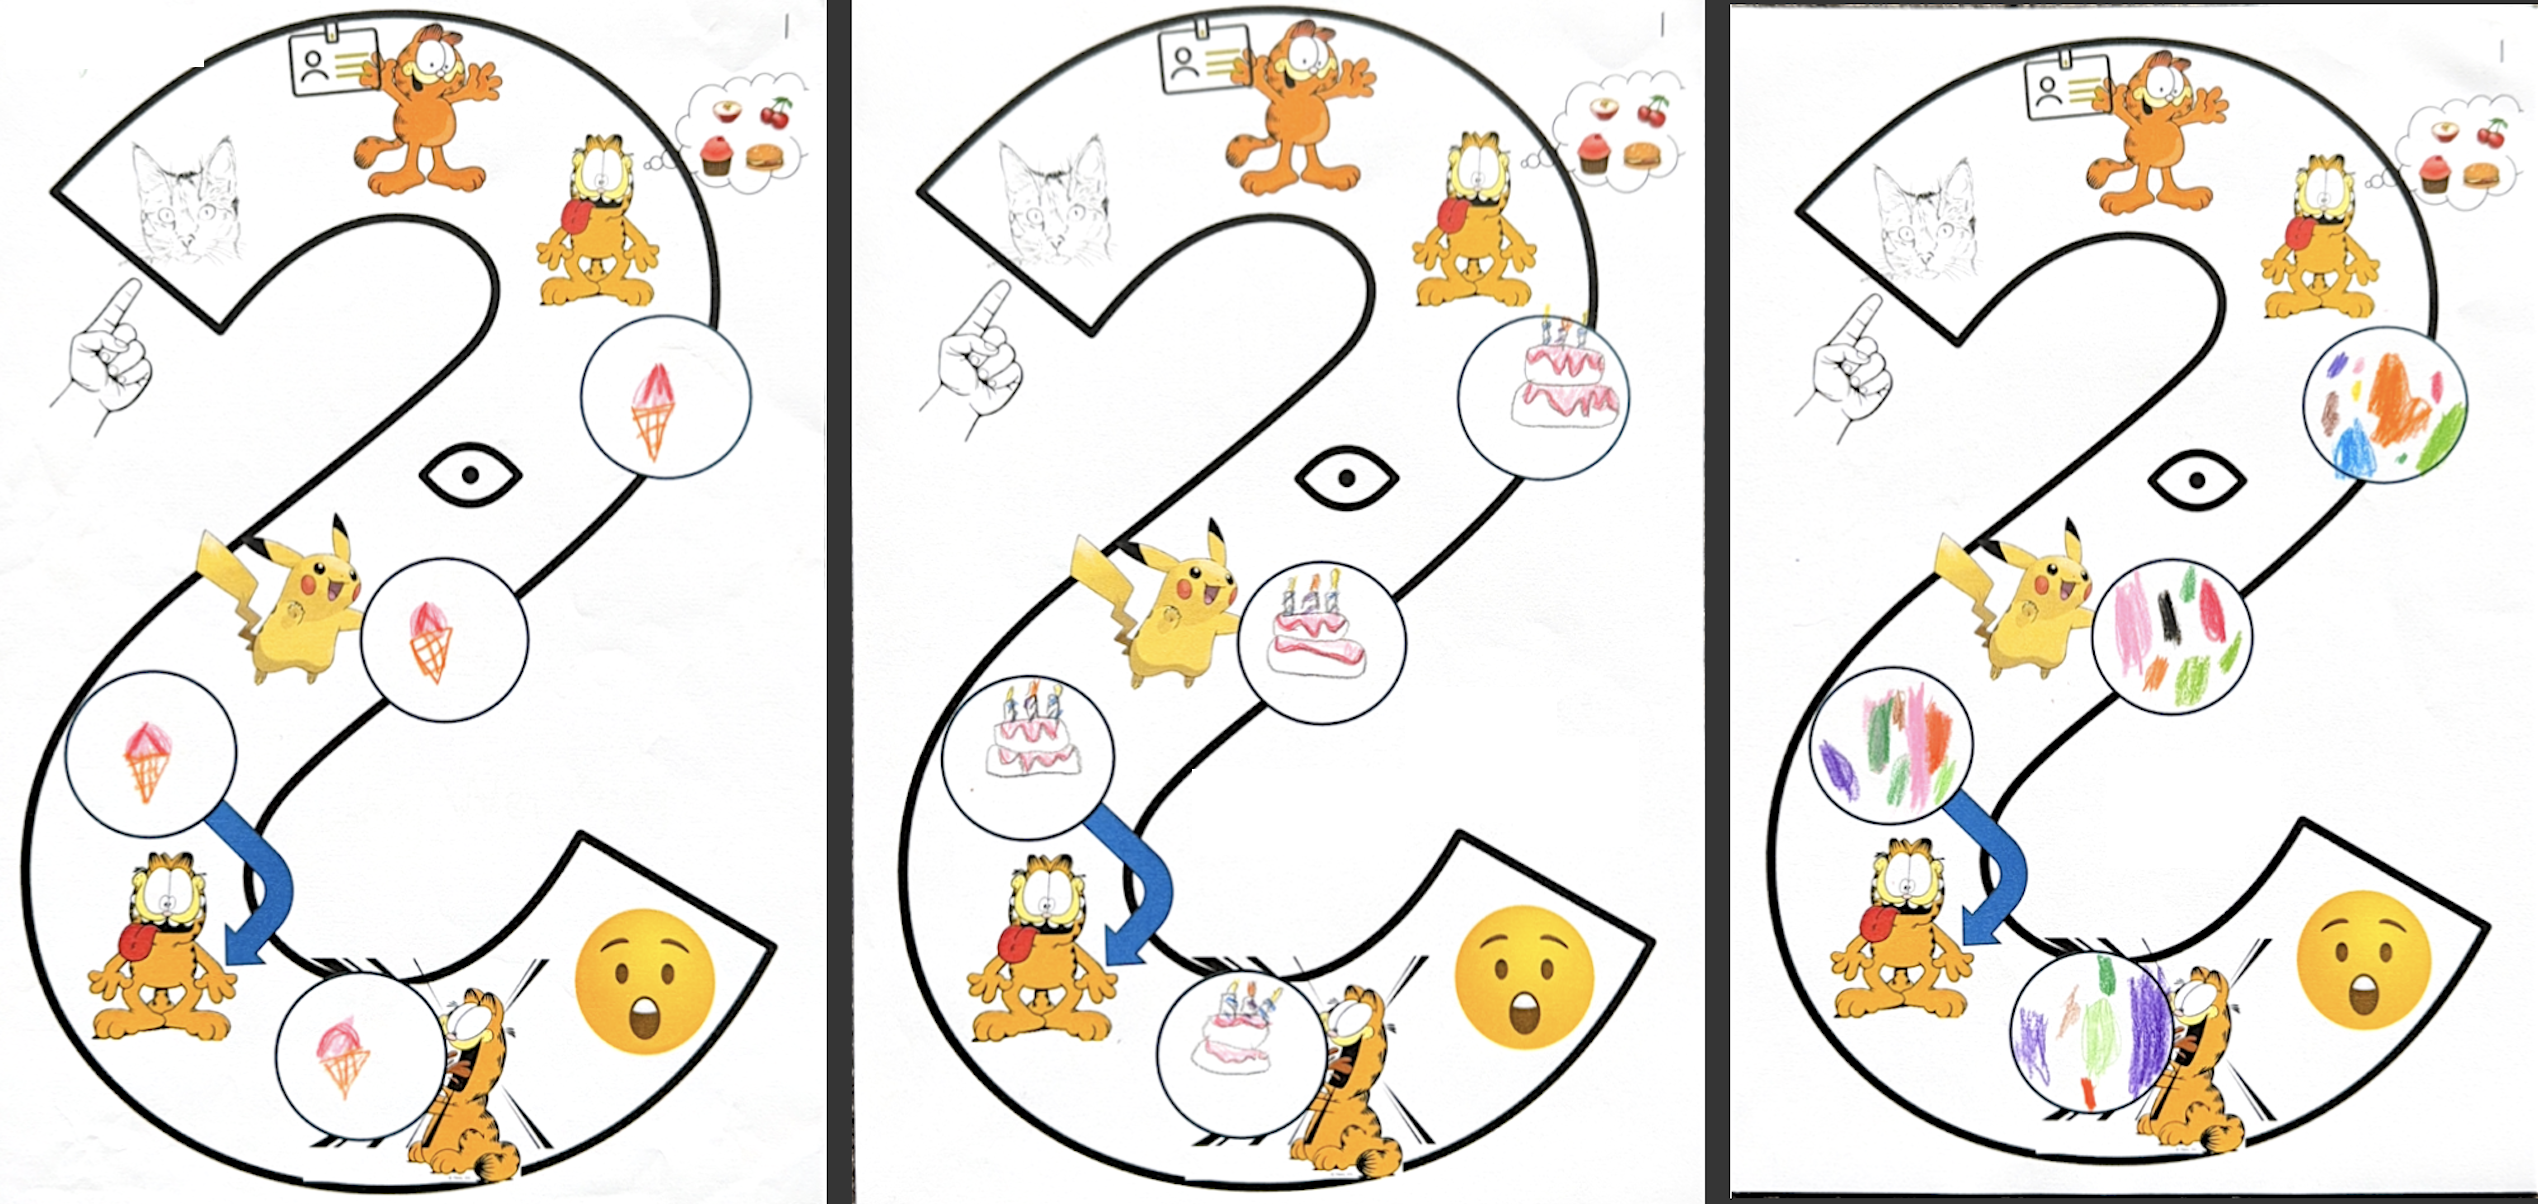
Aren’t the illustrations gorgeous? I love that some of them food illustrations are puzzling however as they are only for the creator, all that matters is that the illustrator can identify their illustration during the retell that follows the task completion! Here I encourage students to maximise their lesson time reading and re-reading this story to themselves during this lesson in preparation for next lesson when they will be recording themselves reading the story independently.
In Lesson 7, students will complete an assessment task whereby they will read either their created story or the class story (student choice) while recording themselves on a device. If not recording their face, remind students to begin with their name and class for future reference!! Some students will inevitably struggle with this task and need support however, those who complete it independently, must on completion, complete a silent activity (FVR, DEAR, colour by number) with the emphasis on silent so as not to drown out those still on task.
A video clip of a paralell story can be shown as everyone finishes up and moves to the front of the room in preparation for the lesson to continue.
Here is a few sound bite of a 5 year old student’s retell assessment:
Inevitably, there will be several students who for a multitude of reasons were either absent or did not complete the assessment task the previous week, so lesson 8 offers them time to rectify this and as would have been done in the previous lesson, before beginning the task, invite students to join in the choral reading of the story several times as a class before inviting students who have completed the assessment task, to read it independently for all to enjoy.
Then to celebrate the end of the assessment, play a post story game, Duplo. This is always a winner with my students and not only does it offer multiple opportunities for story reps but it also encourages discriminating listening. Students sit in a circle with a huge pile of Duplo pieces (or other brands of connecting large blocks) in the centre. Students listen carefully to the teacher retelling the story sequentially. If the sentence told by the teacher is incorrect, they cannot touch the duplo. Instead we together discuss why the sentence was incorrect and ask students to offer the correct sentence. When the sentence is correct, students may each take one piece of Duplo. I love this game because by the time students have more than a few pieces of Duplo, they enjoy listening while their hands are busy creating using the Duplo. This game is also the perfect opportunity to talk about kindness, sharing and accepting compliments.
With the end of term, Lesson 9 and 10 focus on editing and illustrating mini booklets of the class story. Each student receives a mini booklet and at the end of week 10, are encouraged to take the mini booklet home to read it to as many people as possible, plus their pets, any garden statues and a tree in their garden! These booklets offer learners opportunities to demonstrate their awesome Indonesian proficiency to impressed family members and also for MORE input during the holidays!
Before they start illustrating the booklet, they will be instructed to write their name on every page wherever there is a blank line. This gives them practice writing their name and in doing so, makes them the star of their story!! Once this is completed, students illustrate each page with each illustration matching the text. This doesn’t take up the whole lesson unless the students are exhausted and anything else is beyond them. Otherwise, games like Siapa Nama? (guessing who is under the sarong?) or senam penguin are my students goto favourites.
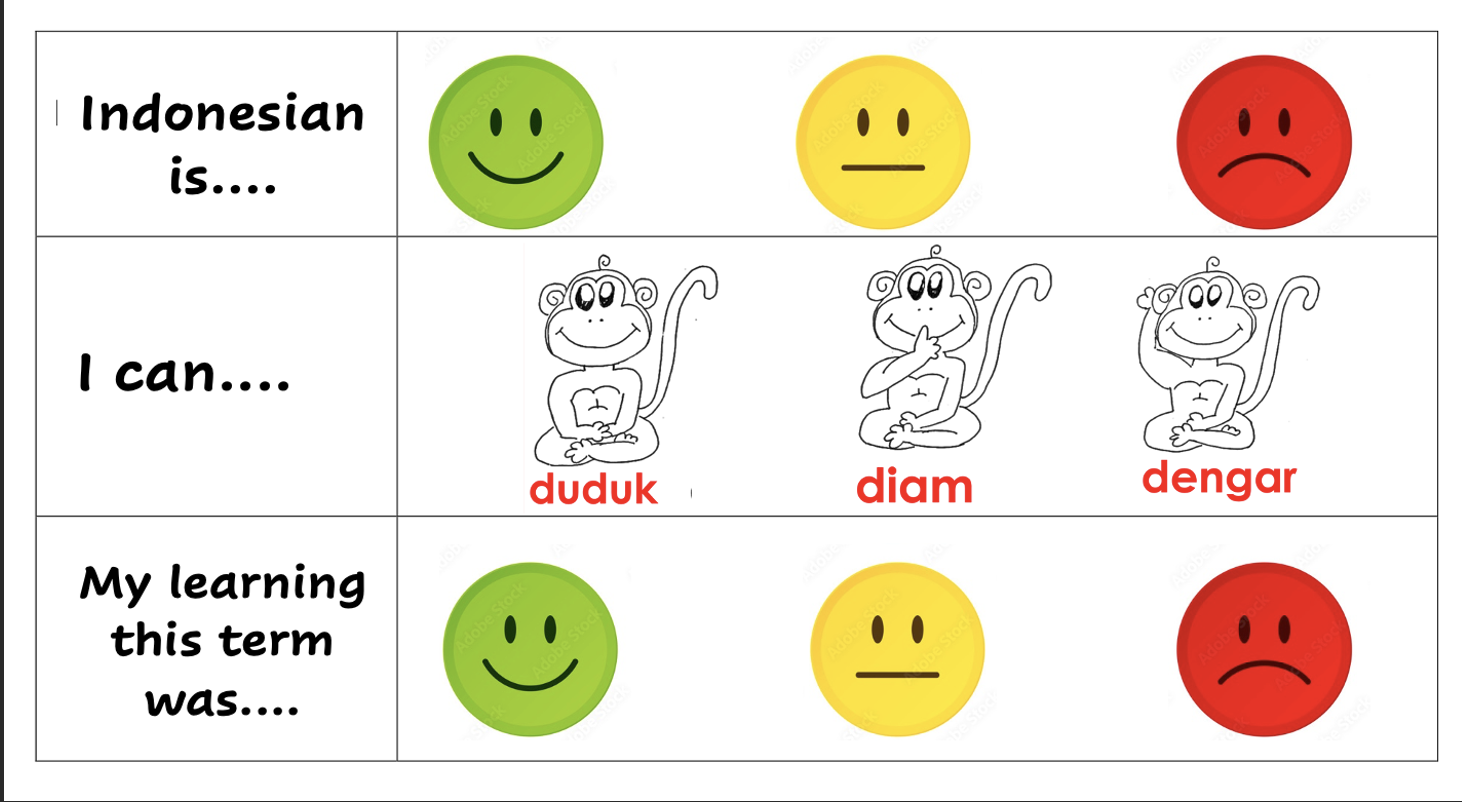
A student self reflection survey is a good way to finish the term. It is a tricky concept for preliterates who find it challenging to reflect back over the term. Consequently, I usually only set a few questions which we read together and they ‘respond’ by colouring either a happy emoji, a ‘lumayan’ (ok) emoji or a kurang baik (sad) emoji. The hardest concept to explain though is that there is no right or wrong answer unless you are copying your friends sheet!
I really hope this post has been helpful although, I am horrified at how long it is!! Kudos to all who made it this far!!
Please drop me a comment if there is anything that needs a clearer explanation or if I have skipped something totally!! I do have a week by week term outline for this story which I am happy to share with anyone who would like a copy! Either email me, message me through facebook or comment below!!

